Showing posts with label carmencho arregui. Show all posts
Thursday, September 17, 2015
Book #260
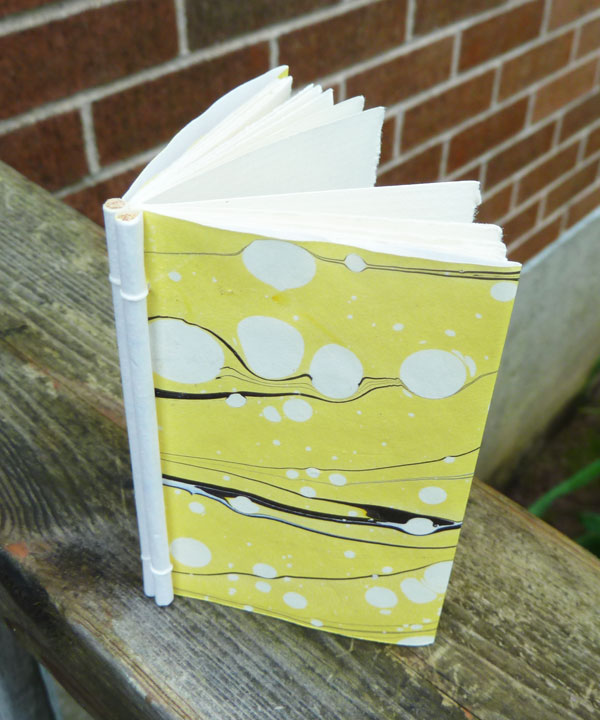
Today's book is another of Arregui's structures. She calls it the label binding, because the spine label is attached with the same cords onto which the signatures are sewn and it works really well.
Wednesday, September 16, 2015
Book #259
This is the three-section variation of the rodback binding that I showed yesterday. I used very slim signatures, which I think is necessary to make this work well. I really like the simplicity of the single signature rodback; it is very slick because the pages and the cover are all bound together in one go. The three-section variation requires both a primary and secondary sewing - first to attach the signatures to each other, and then another to attach the book block to the cover.
Tuesday, September 15, 2015
Monday, September 14, 2015
Book #257
Today's binding is another one devised by Carmencho Arregui, intended for use with content that needs room to expand like sample books or albums. She explains it on her website.
Sunday, September 13, 2015
Book #256
This is made using one of Arregui's crossed structure bindings, called the Marco Polo. If you are interested, all of her crossed structure bindings are explained on her website: outofbinding.com.
Friday, June 26, 2015
Tuesday, June 23, 2015
Friday, May 01, 2015
Thursday, March 05, 2015
Monday, January 19, 2015
Book #19
This is an example of the Crossed Structure Linked binding that I made with a limp leather wrap-around cover and long strap closure.
If you are interested in more details about how to make this structure, visit Arregui's website.
Friday, January 02, 2015
Book #2
This is an example of the Crossed Structure Protective binding that I made with a limp leather cover and double strap closure.
If you are interested in more details about how to make this structure, visit Arregui's website.
Saturday, December 01, 2007
CSB Hidden
I finally did the one remaining Crossed Structure binding on the list. This is the CSB Hidden. I have done two of these books now: one with a leather cover and one with a handmade paper cover. I found the paper cover worked better for me, probably since i was able to get more accurate folds and such.
So the sections are sewn onto the D-shaped part of the back cover.

The front cover is cut with an extension that folds over the spine and overlaps the back cover a bit.

It has little windows for the sewing to show through and the D-panel on the back cover to poke through.

The overlapping pieces on the front and back are then simply secured - I just pasted them into place. Cutting the front cover can be a bit tricky, requiring very accurate measurements for the various cuts. But overall, the process of making the CSB Hidden seemed simpler than some of the other CSBs. Here's the finished book, with the green apple handmade paper looking a bit better in the natural light outside...unlike the washed-out photos above.

So I've worked my way though all of Arregui's CSBs. I am planning to revisit the CSB Solo since i think I'm not doing it quite right. But otherwise, let me see...I think the CSB Basic is my preferred style to make - I find it very flexible and can produce several different "looks" with that structure; however, the CSB Protective and CSB Linked are my new favorites so I want to do more with them now. Well, maybe not right NOW...but soon. I seem to have agreed to make several books for a local customer...24 books actually, to be ready by mid-December....so I'm kinda busy with that for now!
So the sections are sewn onto the D-shaped part of the back cover.

The front cover is cut with an extension that folds over the spine and overlaps the back cover a bit.

It has little windows for the sewing to show through and the D-panel on the back cover to poke through.

The overlapping pieces on the front and back are then simply secured - I just pasted them into place. Cutting the front cover can be a bit tricky, requiring very accurate measurements for the various cuts. But overall, the process of making the CSB Hidden seemed simpler than some of the other CSBs. Here's the finished book, with the green apple handmade paper looking a bit better in the natural light outside...unlike the washed-out photos above.

So I've worked my way though all of Arregui's CSBs. I am planning to revisit the CSB Solo since i think I'm not doing it quite right. But otherwise, let me see...I think the CSB Basic is my preferred style to make - I find it very flexible and can produce several different "looks" with that structure; however, the CSB Protective and CSB Linked are my new favorites so I want to do more with them now. Well, maybe not right NOW...but soon. I seem to have agreed to make several books for a local customer...24 books actually, to be ready by mid-December....so I'm kinda busy with that for now!
Saturday, October 20, 2007
CSB Solo

Finally I've made a couple of the Crossed Structure Binding Solo books. I couldn't use leather for these since the covers need to be folded double - and the kind of leather I use won't work well like that. So these books have handmade paper for the covers.
I first did the CSB Solo in 2004 in a class with Susan Mills at the Dawson Print Shop. These two books are made using my notes from that class. I compared this to Arregui's CSB Solo instructions and there are some differences so I will have to do another session on the CSB Solo and actually follow her instructions next time.
The main difference between the CSB Solo and all the other CSBs is that the cover is made with one long piece of paper (or vellum or whatever you're using) and the front and back covers are never cut apart. The sewing strips are cut from one end and stuck though where the spine will be - then the text block is sewn onto the strips.

Then the other cover is folded into place and all the strips are waving around at the back.

At that point, the strips are crossed over the spine then stuck through little slits in the front and back covers. I like these little books with the handmade paper covers. I spend so much time working with leather that it is fun to get away from it occassionally. And now that I've looked back at Arregui's instructions I do want to try this again to see how it differs.
Tuesday, September 11, 2007
CSB Marcopolo
In her description of the CSB Marcopolo, Arregui explains that the design of this book might be very suitable for travel journals and other portable books, since there are some relatively simple modifications that can be made to make this book have a hook on the spine for hanging, straps for a closure, etc. The photos of this book shown on her website look wonderful.
But this is definitely more intricate than the other CSBs I've done. I'm not sure that I've done it correctly, actually. Oddly, it starts with two cover pieces that are cut exactly the same, each with five strips. I used a paper template to make sure that I got both covers exactly the same.

Sewing the book block was easy enough, but crossing the strips was baffling at first.
What is this madness?

The crossing at the spine depends on some very accurate cuts, cutting half-way through the strips at exactly the right places. On my first attempt, my little cuts were not positioned very well and I had to make some adjustments to prevent puckering. So there are some little extra cuts visible on the spine of this book.

I think this would be easier with a thicker book. I made two of these books, both just 1" thick. The little cuts I was making, needed to be exactly at the middle of the spine. So a thicker spine might be easier to measure and position accurately. I did get the cuts positioned better for the second book, but still a tiny puckering:

Arregui doesn't really explain what I'm supposed to do with the straps after they are crossed. On the brown book here, I have simply trimmed them and attached them flat to the covers using PVA. On the other book, I cut some more slots in the covers and tucked some of the straps inside. This is the part that I'm unsure about and I'm just assuming that Arregui has left this part of the process open for individual interpretation depending on our different design preferences.
The spine looks very sophisticated in its design - and if the straps are dealt with creatively this structure could be used to make beautiful books. But for me, only after much practice!
But this is definitely more intricate than the other CSBs I've done. I'm not sure that I've done it correctly, actually. Oddly, it starts with two cover pieces that are cut exactly the same, each with five strips. I used a paper template to make sure that I got both covers exactly the same.

Sewing the book block was easy enough, but crossing the strips was baffling at first.
What is this madness?

The crossing at the spine depends on some very accurate cuts, cutting half-way through the strips at exactly the right places. On my first attempt, my little cuts were not positioned very well and I had to make some adjustments to prevent puckering. So there are some little extra cuts visible on the spine of this book.

I think this would be easier with a thicker book. I made two of these books, both just 1" thick. The little cuts I was making, needed to be exactly at the middle of the spine. So a thicker spine might be easier to measure and position accurately. I did get the cuts positioned better for the second book, but still a tiny puckering:

Arregui doesn't really explain what I'm supposed to do with the straps after they are crossed. On the brown book here, I have simply trimmed them and attached them flat to the covers using PVA. On the other book, I cut some more slots in the covers and tucked some of the straps inside. This is the part that I'm unsure about and I'm just assuming that Arregui has left this part of the process open for individual interpretation depending on our different design preferences.
The spine looks very sophisticated in its design - and if the straps are dealt with creatively this structure could be used to make beautiful books. But for me, only after much practice!
Sunday, September 02, 2007
CSB Expander
I finished the CSB Expander book yesterday. After this type of book is finished, more sections can be easily added. So, since that is the purpose, I decided to use this structure to bind some of my CBBAG newsletters. I'll be able to add subsequent newsletters later.
Similar to the CSB Linked, this structure has the two cover pieces crossed before the sewing is started. So one cover has strips, the other has holes to put the strips through.

Ready for sewing. Each section is sewn individually. This is what makes it so functional for later expansion. Since the sections are not connected to each other, new sections can be added anywhere - front, middle, back, whatever.

Finished sewing, strips visible inside the cover.

Another neat and tidy structure, and very functional. Now my CBBAG newsletters are way stylish in their teal suede covering.
Similar to the CSB Linked, this structure has the two cover pieces crossed before the sewing is started. So one cover has strips, the other has holes to put the strips through.

Ready for sewing. Each section is sewn individually. This is what makes it so functional for later expansion. Since the sections are not connected to each other, new sections can be added anywhere - front, middle, back, whatever.

Finished sewing, strips visible inside the cover.

Another neat and tidy structure, and very functional. Now my CBBAG newsletters are way stylish in their teal suede covering.
Thursday, August 30, 2007
CSB Linked
The next Crossed Structure binding that I tried was the CSB Linked. The result is very clean and tidy, which I like.
In this structure, the two covers are cut separately; one with strips for sewing. The other cover has slits cut for the strips to slide through.

The covers are thus linked prior to sewing, unlike the previous CSBs that I have described where the second cover is attached after sewing is complete.


The sewing strips are slipped out and in though little slits in the front cover. Because the covers are joined before the textblock is sewn on, the covers are very secure. I made two of these, here is the back cover of the grey book, and the front of the brown book.
In this structure, the two covers are cut separately; one with strips for sewing. The other cover has slits cut for the strips to slide through.

The covers are thus linked prior to sewing, unlike the previous CSBs that I have described where the second cover is attached after sewing is complete.


The sewing strips are slipped out and in though little slits in the front cover. Because the covers are joined before the textblock is sewn on, the covers are very secure. I made two of these, here is the back cover of the grey book, and the front of the brown book.
Sunday, August 19, 2007
CSB Protective
I'm really happy with the Protective version of the Crossed Structure Binding. I think this will be a great structure for some of my journals.
The back cover is cut with strips for sewing.


The front cover is just a square with slits for the strips to poke through.

The attachment of the front cover piece to the back cover surprised me, but it works. It just folds over the spine and is stitched in place. I used PVA on there too.

Then the strips are used as closures on the front, attaching to buttons on the wrap-around flap. Very medieval-looking.

These are my new favorite books. Since I've never made a book like this before, it seems really neat and novel right now and I will certainly be doing more them. But I still plan to do all the different CSBs - I think the CSB Linked is next.
The back cover is cut with strips for sewing.


The front cover is just a square with slits for the strips to poke through.

The attachment of the front cover piece to the back cover surprised me, but it works. It just folds over the spine and is stitched in place. I used PVA on there too.

Then the strips are used as closures on the front, attaching to buttons on the wrap-around flap. Very medieval-looking.

These are my new favorite books. Since I've never made a book like this before, it seems really neat and novel right now and I will certainly be doing more them. But I still plan to do all the different CSBs - I think the CSB Linked is next.
Wednesday, August 15, 2007
CSB Basic
I am planning to work through each of the crossed structure bindings now. Arregui details seven different ways to make a crossed structure binding and I have only tried two of these. The one that I use most is the Crossed Structure Binding Basic (CSB Basic). So I have done this a hundred times but I went to Arregui's website to see the instructions again and discovered that it isn't so basic. She actually shows how to do the CSB Basic with three different sewings. So I did all three. And surprisingly, the way I usually sew them wasn't included so I did that too, resulting in four different books just to cover this one binding!
One big difference between this CSB and the others, is that the front and back covers are cut at the same time. For all the other CSBs, the covers are cut separately. I started with this template and used it for all the books, in four different colours.


I have always used the 3 inside strips for sewing but discovered that Arregui also shows how to sew the book using the other 4 strips. This makes an obvious impact on the appearance of the finished book. So I sewed two of these books on 3 strips, and two on 4 strips. And all four books are actually sewn a bit differently, one of each using kettle stitches and one with some extra wrapping around the strips...Arregui says this can be good in thick books to keep a consistent swell. Not necessary for my books but I did one like it anyway.

Then I just had to attach the front covers and I have four very different books all made using the CSB Basic instructions.

I like the alternate sewing on four strips and it seems to make the spine a bit sturdier...CSB Protective comes next.
One big difference between this CSB and the others, is that the front and back covers are cut at the same time. For all the other CSBs, the covers are cut separately. I started with this template and used it for all the books, in four different colours.


I have always used the 3 inside strips for sewing but discovered that Arregui also shows how to sew the book using the other 4 strips. This makes an obvious impact on the appearance of the finished book. So I sewed two of these books on 3 strips, and two on 4 strips. And all four books are actually sewn a bit differently, one of each using kettle stitches and one with some extra wrapping around the strips...Arregui says this can be good in thick books to keep a consistent swell. Not necessary for my books but I did one like it anyway.

Then I just had to attach the front covers and I have four very different books all made using the CSB Basic instructions.

I like the alternate sewing on four strips and it seems to make the spine a bit sturdier...CSB Protective comes next.
Tuesday, July 17, 2007
Crossed Structure Binding
I included the Crossed Structure Binding on my list of historical bindings to do; however, I am not sure that it really qualifies as an historical structure. I actually make a lot of these books, using the Crossed Structure Binding Basic (CSB Basic) technique as described by Carmencho Arregui on her website. This structure works really well with a leather cover so it has become one of the styles I use often when making journals (see first pic).Based on the information on Arregui's website, the CSB is her own invention, the idea for which came to her when she was doing her restoration work with historical longstitch bindings. So, the CSB isn't really an historical binding; rather, it is inspired by some historical bindings. Good enough.
I will have to explore some of the other techniques she has outlined on her website. The only other technique that I have done is the CSB Solo structure, which works well with a paper cover (see second pic) but not with a leather cover. Arregui suggests that leather could be used if it were pared very thin and also laminated with Japanese paper. But I haven't tried that.Arregui also has details on her website for the CSB Protective, Linked, Expander, Marcopolo, and Hidden models and I have tried none of those.
My list of historical bindings to do, has only one more item and that is the girlde book. I have two started and hope to get them finished soon but they are taking longer than a lot of these other bindings. Then I'll have to start on a new list of bookbindings I haven't tried yet, and do some of these other CSBs.
Subscribe to:
Posts (Atom)