Wednesday, May 04, 2011

The Illustrated Accordion


The Illustrated Accordion is an exhibit at the Kalamazoo Book Arts Center Gallery in Kalamazoo, Michigan (kalbookarts.org). The exhibit will open May 6th, continuing until May 27th. I have a miniature accordion, titled "Piano Generations" that is part of this exhibit.

All the work in this exhibit has been photographed and can be viewed on Flickr. But be sure to check it out "in real life" if you happen to be in Michigan!

"Piano Generations" is a limited edition artist's book, hand-marbled paper on the covers, ink jet printed piano keys, family snapshots in pockets. Limited edition of 10.

Wednesday, April 27, 2011

Halifax Crafters Spring market - this weekend!

For my local readers in Halifax NS and nearby, this is going to be a fabulous Spring market - if you're in the mood for a little/lot handmade goodness this weekend. I'll be there with my work!

Friday, April 22, 2011

Happy Earth Day

So I've really blown my New Year's Resolution this month but let me get back on track today, celebrating Earth Day, with some journals I made using all recycled and repurposed materials. These are hardcovers, each with an exposed spine and chain stitch binding.


The paper for the pages in these journals is 100% recycled. The board used for the covers is all scrap board that would have been destined for land fill: chip board, eska board, and some pressed cardboard from the back of a large sketchbook. The decorative papers on the covers are pictures torn from magazines. Each cover image is created by combining two different pictures that were torn into strips. Click the photo to make it bigger if you want a better look at the images.

Tuesday, March 29, 2011

Suminagashi marbling this time

Yesterday, I pulled out my supplies for doing Suminagashi marbling. A very different experience than Ebru marbling, and very different results too. I really should practice this more often - I haven't tried it for a long time. So rather than paint and carageenan size, Suminagashi uses ink and water. There is not a lot of information about Japanese marbling available, but there is a book by Anne Chambers that you might be able to get if you are looking for detailed information.


A couple of the results -


Saturday, March 26, 2011

What to do during Earth Hour?

Our household participated in Earth Hour today by turning off all the lights, computers, and TVs between 8:30 and 9:30pm. What to do, when you would rather be bookbinding? I planned ahead, made sure that my solar-powered book light was charged, and spent the hour reading some Szirmai.


This book light is a handy gadget - check it out on Useful Things. (The bendy wire can be argumentative but the light is good and stays charged for a full earth hour and more.)

Happy Earth Hour! What did you do during earth hour?

Thursday, March 24, 2011

Some new marbled papers

A few of my favorites from my last marbling session. A bird wing pattern: A waved chevron: Spanish wave on stones: The thistle pattern:

Saturday, March 19, 2011

A new travel journal

I finally finished this book for myself. It's my 2010 travel journal. As I've explained before, my travel journals are made after the fact - rather than during my travels as most people would do it. Some previous examples of my personal travel journals are here and here.

We didn't make any big trips last year, just a bunch of small road trips, camping, etc. All the papers that I collected from those little trips, tickets, maps, etc are incorporated. Some maps and brochures were folded to make folders and the smaller items are tucked into the folders. The front cover has a small clear plastic container embedded and it contains a shell and some dried wild rose petals, which we collected at a campground. I used a sheet of my marbled paper on the front cover - a favorite that I had been saving.


Tuesday, March 15, 2011

Marbling a bouqet pattern

I just spent a few days doing some marbling so I took some pictures of the different steps for making the bouquet pattern - which is one of my favorite patterns when it turns out well. There are actually four different patterns created in the process. These photos are taken of the paint floating on the carageenan size, so the colours look strange, but hopefully you can get an idea of what's happening. Click on the pictures to see them larger.

First, the stone pattern.


Then a gel git (or git gel... the jury is out on which is the best way to say that).


Then it becomes a Nonpareil.


And finally the nonpareil is transformed into the bouquet.


Here it is, printed and rinsed and drying in the sink.


And after it has dried completely.


All for the love of a single sheet of paper!

Monday, February 28, 2011

Something Odd

Rats, I have broken my resolution already - which was to post on my blog at least once per week. I will try to make up for it at some point! I made an odd little accordion book from a feather mask - this is part of a February challenge with the Trans Canada Etsy Team - the theme being "something odd". Visit the TCET blog and vote for your favorite odd item!

Tuesday, February 15, 2011

Congratulations Rob!

Thank you to everyone who visited my blog and left comments for me during the past week. Last night I numbered all the entries; with the blog comments and facebook comments combined, there were 90 possible winners. I used random.org to pick a number and it selected Rob Ross' number so he's the lucky winner of the weekly planner!

Sunday, February 06, 2011

"It's not too late to stay organized in 2011" Giveaway!

So I thought all the weekly planners were dealt with, but I had a sold one returned which was undeliverable and the buyer no longer wants it. So I'm going to give it away to some lucky blog reader or Facebook fan, yay! Here's how you can get your name into a random draw for this weekly planner: Tell me what you think of the new product photos in my Etsy shop. Leave your feedback as a comment either 1. Here on my blog or 2. On my Facebook page Also be sure to leave enough information so that I can contact you if you win. I'll do the random draw on February 14th - this is the planner that you could win! This weekly planner has a wrap-around leather cover and is bound using a longstitch sewing, visible on the spine. The wrap-around cover is soft honey yellow cowhide leather. There is a leather strap to wrap around. Book size is about 6¼" x 3¾" (or 16cm x 9.5cm). This book contains: * a 2011 calendar with a 2-page spread for each week * other standard pages for personal info, phone numbers, conversion charts, important dates, 2011 & 2012 at a glance, reference maps, etc. * a set of pocket pages at the back * lots of blank pages for notes * an attached ribbon bookmark --> Comments for this Giveaway are now closed - winner will be announced shortly!

Wednesday, February 02, 2011

Wednesday, January 19, 2011

Brown paper bags

We use way too much of everything and throw away most of it. So I try to find a use for some of that stuff that normally gets tossed aside. One of the things I have been saving is paper bags.


I also save the board from the back of sketchbooks, so I combined that with the paper bags and made some little notebooks with a chain stitch binding.


They are a million miles from archival, I know that; but, they are just notebooks for scribbling grocery lists or other simple things and I don't think they need to outlive me!

Here's a shot of the spines - as requested!

Wednesday, January 12, 2011

Girdle Books

Another project that I was working on in the last few months, was making a few more Girdle Book journals. I have made some before and each time, I tweak the process a bit. As always with the girdle books that I make, I'm not technically binding these like they would have been done historically - I'm playing the 'artistic license card' with a lot of the details. You can read a bit more about this structure in an earlier post. This time I sewed my own endbands which, I think, is a nice touch. This is how it looks after the text blocks are ready with endbands completed.


Some of them looked better than others in the end, here are a couple of the better ones up close.


I wanted to use my own marbled papers for the endpapers too so the endbands were made to coordinated with them.


I used leather for the coverings and added either metal corners or raised bands and each one has a clasp.


Tuesday, January 04, 2011

New Year's Resolution and Tea-stained Paper

Happy New Year to all my blog readers! I have just decided that my New Year's Resolution is to post more regularly here on my blog - no less than once per week. I used to be able to manage a weekly post but last year was slack; so, I resolve to do better this year!

I'll try to catch up by posting some things that I meant to post last year. There were several projects where I took pictures with the intention of sharing them here on the blog - but never got around to it. One such project was my first attempt at tea-staining paper - the results were quite good. I realize that introducing tea will make the paper non-archival but I wanted some old-looking paper and this seemed the best way to achieve the effect.


This is how I did it...

I made some strong tea and put it in a shallow pan. I crumpled the pages and tossed them into the tea. I did not fully submerge the paper.


I removed the papers, flattened them a bit, and laid them out to dry.


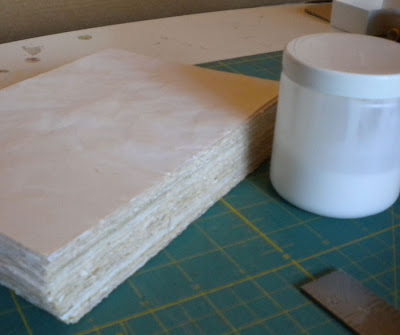
When they were all dry, I had a stack of paper like this,


Which I put into the press, and got this:


I used this paper to make some thick signatures - here they are on top of some regular signatures made from the same paper (unstained).


I used the thick sections to make some journals in the style of the Nag Hammadi books. I've discussed this book style before so you can read more about the history in some of my earlier posts.

One of these with the stained paper was included in the December BEST book swap and another is pictured here. I think the old-looking paper was exactly right for these journals.


If you have any suggestions for improvements to my tea-staining process, please leave a comment and tell me about it.