Friday, July 15, 2011

Guest Blogger Lexi Janezic, Letterpress

Lexi Janezic is a mixed media artist (drawing, painting, collage) and prospective book artist living in Kansas City, Missouri. We met this year at Paper and Book Intensive, where Lexi was attending as one of the Nell Meldahl scholarship winners. You can visit Lexi's blog at thegreywoman.tumblr.com.

As part of my continuing efforts to tell everyone about all the PBI classes, even the ones that I didn't take, Lexi agreed to tell us about the Letterpress class that she did with Jean Buescher Bartlett.

I started PBI 2011 having no knowledge of what to expect from this pleasantly unique event. The idea of having workshops strictly devoted to the art book and paper was as foreign to me as astrophysics. For the past year I have lived in a world where I felt I needed to be either an artist or a conservator, it was strange to think that I would be able to meet people that defined what it is to straddle the line between these two very different paths so seamlessly. It was a tremendous relief from my conscience as a creative individual, who had initially felt that it was impossible to find a happy medium between the two worlds.

From talking amongst my fellow PBIers, it became clear that Jean Buescher Bartlett (Blood Root Press), is well respected in the PBI community, and upon telling people I was taking letterpress with Jean, was overwhelmed with the consensus of people who wished to take letterpress printing with Jean at some point in their lives.

I have wanted to take a letterpress class since I first saw and felt the texture of impressed text on paper. This was a subconscious desire initially (seeing as I was a lass of 8 or so), but upon further investigation it was knowledge that became apparent as time went on, and intended to attain it at some point in my life. PBI was the perfect opportunity to become familiar with a medium I wanted to covet as much as my own.

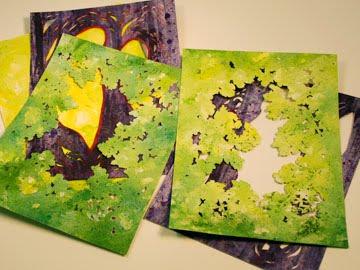
From day one, we were setting type and printing, and of course, mulling over how to translate our own creative ideas and energies into the book form. To get the ball rolling, Jean had us write down nouns, adjectives and adverbs, place them in a hat, and create sentences based on the words chosen. The sentences produced from these found words were beautifully articulate, most having the intellectual ambiguity most poets can only hope for. Shortly after the completion of our sentences, the text was assembled into one poem, typeset, and placed in a galley in the press with appropriately arranged furniture. Following the typesetting, the printing process was introduced along with all the experimentation involved with newsprint packing, paper proofing, and finally, fine quality printing (+/- a few fingers). A typically long and tedious process cut down to its bare essentials.

The book shown here was designed and created by Jean Buescher Bartlett; the type was set by the students in this letterpress class. Photos by Ah-Ram Park.

Jean supplied us with a plethora of information on letterpress process, simple book structures, text, concept, and how these things can be made to manifest themselves together as one.

Photo by Ah-Ram Park.


In between people using the press, Jean introduced us to the book structures, all of which were simple and easy enough to interpret with something made with pages printed from letterpress. These books were primarily held together with PVA, which allowed for a wider margin of error for the expected inconsistencies in printing.

Of the vast range of information I was introduced to in this class, what was of particular interest to me was Jean’s creative process, specifically on the things that inspire, inform, and translate themselves to create her work. This presentation was filled with book layouts, hand drawn notes and fairy tales of yore. What was most striking to me about this presentation was the range in the types of work shown, most being small detailed hand-drawn illustrations and found media.

This class was a pleasure to take. Jean is a down-to-earth and patient person, and knowledgeable to boot about all things press related. Not only did Jean provide me with enough epiphanies about life and art to last me for quite some time, it provided a perfectly balanced technical and creative outlet tailored to our own artistic needs and wants.


Saturday, July 09, 2011

Guest Blogger Elizabeth Sanford, Tunnel Books

Elizabeth Sanford is a watercolor artist who was seduced several years ago by the book arts. She is fond of flexicubes and teaches at Watkins College of Art, Design & Film in Nashville, TN.

Elizabeth's website is currently being remodeled but be sure to look for the revised version of elizabethsanford.com this Fall. Elizabeth has kindly agreed to tell us about the tunnel book class that she took at PBI this year. Thank you, Elizabeth.

I love Andrea Dezso's work (www.andreadezso.com), so when I saw that she was teaching a tunnel book class at PBI, I had to sign up! We learned 3 tunnel structures: the Jennifer, the Stephanie and the Luminitza.

My favorite was the first one, the Jennifer, so I spent most of the workshop on that one. It's a structure that Andrea invented that involves sewing the panels to the accordion sides so that they almost float. If you look carefully, you should be able to spot the silhouette of a bird (a yellow-billed cuckoo) in the front panel; there's another hiding in the branches on the second panel.


I started cutting these panels with an x-acto knife but switched to a scalpel in the middle of this model, and it was so much easier! I got mine from the PBI store run by Nancy Morains (here's her website: www.colophonbookarts.com/binding.html). I'm also interested in trying the kind of Olfa knife with carbon steel blades that Andrea uses.

The other 2 approaches are based on commercially printed books. The Stephanie is adapted from Winnie-the-Pooh's Pop-up Theatre Book (1993). The panels are attached with tabs at the top and bottom, and it folds flat. Here's my model in the open position:


The Luminitza is a 4 layer pattern based on a German book published in 1878. Here's Andrea's diagram, which reveals some of her humor:


I'm currently working on a more complicated version of the first model. Here are the 5 panels:


I'm planning to have more space between the panels this time so it will be easier to find the creatures that are hiding in the woods.


Sunday, July 03, 2011

Origami animals

I just worked through a brief origami addiction. Made some fish...


Some crabs...


And some frogs...


Maybe I can get back to the books now!

Saturday, June 25, 2011

Guest Blogger Sandra Anible, Conservation Enclosures

Sandra Anible is a book artist living in Madison, Wisconsin. At PBI in May 2011, she was one of the lucky scholarship students on hand to help keep PBI running smoothly and taking classes along with the rest of us. She has very kindly agreed to tell us a little bit about one of her classes, where they made a whole array of boxes for conservation.

During the first session of the 2011 Paper Book Intensive, Denise Carbone taught a class on how to create conservation enclosures. Denise is a conservator for the American Philosophical Society who also teaches at the University of the Arts in Philadelphia.

A selection of boxes made during this class:


Denise provided instructions for several conservation enclosure structures. Each enclosure was designed to nest perfectly into the previous enclosure. We were all asked to bring one small object to class. The enclosure at the heart of our set of nested enclosures was customized to accommodate whatever object we brought.

A few more boxes made in this class:


The strategy of making all the structures fit inside each other, proved both economical with regard to space and convenient with regard to each student leaving the class with a handheld, multi-faceted teaching tool. Pre-printed, transparent, circular labels for each enclosure were also provided to each student to further enhance the ease with which they could demonstrate the form and function of each piece.

Sunday, June 19, 2011

Secret Belgian Binding - not a secret anymore

A few years ago, I posted on my blog a list of historical bindings that I wanted to revisit. One of the bindings on that list was the Secret Belgian Binding. The history of this binding was obscure and, other than it being somehow Belgian in origin, nobody seemed too sure about it. As it turns out, it's not even an historic binding!

Hedi Kyle and Emily Martin were both at PBI last month, and they have been the unofficial experts on this binding. So, as I'm sitting across the lunch table from these two, I made some mention of the Secret Belgian Binding. I don't remember my question, and it doesn't matter, because the two of them became excited about telling me the important news: they found the person who invented this binding! Anne Goy invented the Secret Belgian Binding - and she does indeed, live in Belgium.

In the 1980s, Anne Goy developed this binding because she really liked the look of the Japanese stab bindings, but wanted a structure that would open fully. She showed the binding structure to a few people, they showed a few people, and they showed a few people, etc. Eventually the origin of the structure was obscured but its popularity had spread across the globe.

Thank you, Anne Goy!

Saturday, June 11, 2011

Guest Blogger Amy Greenan, In Search of Content

Amy Greenan is a fine artist, graphic designer, teacher, and also a bookbinder and she was a fellow participant at PBI this year. Amy agreed to tell me more about one of the PBI classes that I didn't take (since one person can only take 3 out of 10 classes). This is her account of the class, "In Search of Content" with Susan Skarsgard.

You can see some of Amy's work on her website (www.amygreenan.com) and learn more about her activities on her blog (www.chociblog.blogspot.com).

Two of the classes I had the pleasure of taking were with Rhonda – Book Doctor 101 and Fragments of Bookbinding Structure (otherwise known as Extreme Bookbinding!), which she’s already written about. So, Rhonda has asked me to tell you about my experience in a class that she didn’t take, which largely dealt with creating content for the artist’s book and the creative process in general. Of the three workshops I signed up for, this one was the most “arty” for sure.

In the over ten years I’ve been making books, my focus has mainly been on playing with structure and design, and so producing mostly blank books for other people to fill in. As an artist whose main medium has been paint on canvas, making books for me has been something to relax in and not feel pressure to make something particularly meaningful. I must admit, though, that was getting stale – I’ve been spinning my wheels for way too long, and for someone who also ended up becoming the bookbinding person about town over the years and teaching it quite a lot, I really wanted to up the ante and get more serious about it. I wanted the work I was making in that form to be as interesting and meaningful as I hope my paintings are.

The Paper and Book Intensive was truly transformative in that way – I found what I was looking for in the sense that I did have a lot of focus on more serious things like book conservation and historical bindings, but I also found myself really inspired during and outside the workshops. The people – don’t even get me started on how great every person attending PBI is. Being amongst a large group of “your own” is truly life-affirming – I am not exaggerating on this point. The one workshop that really opened my eyes and my imagination up to the possibilities of communicating big (and more personal) ideas visually and via the written word (hm, going back to my zine days!) was with Susan Skarsgard, an amazing woman of many talents, least of which is designing logos for cars (Saturn was hers!), but also beautiful and illustrative calligraphy, and an challenging but effective teaching style – a little drill sergeant mixed in the first couple days to draw us out of our respective modus operandi for sure.

In the first two mornings we had together, we created content, almost unknowingly. Using the old exquisite corpse trick, we as a group of 12 wrote 12 different poems, each with its own surprising tone and message. A similar method was used to create visuals, “merely” mark-making exercises where Susan’s real boot camp tone came out at its best. Moving around the tables almost constantly and working with varied media and colors, with less than 30 seconds to connect with the paper in front of us at a time, we truly got a workout, creatively and physically. We were urged to make different marks every time, usually with a prompt, for example “Make a dotted line across the page!” “Draw four squares!”, “Draw a slow line using your tool in an unexpected way,” etc. We also worked on creating the essence of letterforms one mark, one person at a time, and then tried working with India ink only (and then washed away our efforts with a hose outside the studio!). A couple hours of concentrated effort resulted in a series of large pages for each of us to claim and further work with for our individual projects.


Then came the challenge of putting all these disparate parts together into a book structure. Susan showed us one she devised that was Frankensteined out of the “Instant Book” that involves only some simple folding and cutting and creating a section out of just one sheet of paper. This I was familiar with, but then she proceeded to put a few together using some sewing similar to a Two Sewn as One binding, except there was an extra sheet in there somehow. Very clever! She then demonstrated a wrapped soft cover using some Bristol board and Canson Mi-Tientes (one of my favorite papers!). In the end, these simple and familiar techniques yielded a beautiful, sturdy structure that presented many possibilities. We now had imagery to respond to, add words to, develop further visually. Sometimes pages, by fate alone, appeared to be perfect compositions without any additional workings. Others suggested the need for something, anything. Everyone had a slightly different approach, of course. Hedi Kyle, the luminary of our bunch, reveled in cutting out windows in some of her pages and using pochoir (stenciling) to create deceptively simple and stunning abstract imagery. I should have taken note of her approach – taking care to work into every page a bit at a time so that she was able to have what appeared to be a complete work in a very short time. But hey, it’s Hedi Kyle! Would you expect any less?

My particular book ended up being one of those that wasn’t so felicitous. I decided to work into all the spreads, but only got so far as the third one before class was over. That was fine, it gave me something to take home with me. I found myself inspired by the natural surroundings we lavished in at Ox-Bow, and I used a pine cone and an acorn top as visual talismans. My poem (though not really just mine, but everyone’s) worked perfectly with the images I was producing, so I let myself be inspired by Susan’s lovely calligraphy and explored not only the words and how they danced with the images, but also the letterforms themselves as individual images. This naturally appealed to the graphic designer in me.

All in all, this class was immensely satisfying. Susan was a delightful study in contrasts – one moment extolling the virtue of slowly folding the paper, and really feeling its pliability, taking time to really know it; the next barking out orders like the most efficient line cook. I tell you, sometimes, it’s really nice to have someone tell you what to do and how to do it. When you can give yourself over to that and let the process take over, it can result in the most amazing things.

Thursday, June 09, 2011

CBBAG Book Arts Show and Sale - June 11

Everyone in and near Ottawa needs to check out the "2011 National Handmade Book Arts Show and Sale" this weekend at Library and Archives Canada. I wish I could be there - if anyone goes and wants to report back and tell me all about it, please do!

Saturday, 11 June 2011, from 10:30 a.m. to 4 p.m.,
Library and Archives Canada,
395 Wellington St., Ottawa, Ontario.

Open to the public and admission is free.

Exhibition: The Nature of Words - all day

Speakers include: George Walker "The Future of the Book" at 4 p.m.


Future of the Book is the theme for this year’s CBBAG Book Arts Show. An impressive array of book artists and artisans are coming together to look at this intriguing question.

Hosted by the Ottawa Valley Chapter of CBBAG

Sunday, June 05, 2011

Extreme Bookbinding

The third, and most intensive, class that I took at PBI was with John Townsend who is a bookbinder and conservator extrodinaire and operates Anonymous Bookbinder in upstate New York. In this class we made three books. Extreme bookbinding, because there was a lot to accomplish in a short time. We were folding and tearing, setting up the sewing frame with cords for one and tapes for another, we were paring leather and molding vellum, we were plouging textblocks, and we hammered and rounded, and on and on... We focused on structure, and I love structure.

My finished books...

First, the publisher's board binding. John had several examples of this kind of binding from its heyday - beginning in the mid 1700s - when the structure became widely used in English binderies. Key features of the binding: it is sewn on recessed cords, and two are laced into the boards and the others are cut; the textblock is left untrimmed; the boards were almost always covered with blue or grey paper; paper spine pasted directly to the spine of the textblock; endpapers are pasted down with the book lying open.

A couple of the publisher's board binding models made by our class...

Second, a type of German case binding, or Bradel binding, also from the mid 1700s. This structure uses a molded spine wrapper attached to cover boards to create a case. We made a variant of this traditional German case binding with vellum for the spine. Other features: textblock is trimmed on all 3 sides and often speckled; sewn onto tapes using a French link then the tapes are removed; sewn endpapers; paste paper or marbled paper typically used on the covers.

A couple of the German case binding models made by others in my class...

Third, we made a single section book a la T. Harrison's 1947 article in Paper and Print. This structure was really interesting because even with only a few pages, the result was a rounded and backed textblock - not easy to achieve with a single section. This structure was presented as a solution for library binderies when a few sheets need to be bound for the stacks, this binding will allow the slim volume a bit more substance so it doesn't get lost on the shelf. The model that I made has a textblock of only four folios (I barely finished this book, so thank you, Jean for helping me with the leather spine on this one after the class was finished!)

My single-section book...


Tuesday, May 24, 2011

Paper Engineering

At PBI, I also had a class with Carol Barton, doing paper engineering...otherwise known as pop-up and moveable books. Carol is, of course, the queen of pop-ups. Carol has some books about making pop-ups, The Pocket Paper Engineer Volumes 1, 2, and 3.

We spent our time making about a million different pop-up structures (ok, I'm exaggerating, but only a little bit). We started with the basics, like little pop-up squares and triangles that are very common and often used in cards and accordion books, etc. and we worked our way through all their variations, moved on to more elaborate props and platforms that can be built up higher and higher, and even did a few 3-D shapes by the end of it.

My favorite of the single shapes, the star (good thing I wrote "star" on this sample so I'd know what it was...)


Also really enjoyed making these little accordions...


And a sample of combining different shapes and structures...


Carol was a great teacher, be sure to grab any chance of taking a class with her. And thank you, Carol, for helping me find my gate at the airport as I rushed to catch my flight!

Friday, May 20, 2011

Book Doctor

So I'm at PBI (although my luggage took the scenic route and arrived two days later than I did). One of the classes I have been taking is book repair with Ann Frellsen. The focus has been on quick treatments for damaged books, so that they will withstand continued use (in other words, not for rare or ancient books requiring specailized detailed treatments).

We used Japanese tissue to repair holes in pages and to reattach a page that has been cut out. We also did tipping in of pages, endpaper replacement, spine replacement, end cap reinforcement, and all sorts of other things in between. She was very good at showing us what needed to be done for each of the books we were working on since they are all different and some required treatments that others did not. These are not very exciting things to photograph since the finished work is not very obvious - or it shouldn't be very obvious!

One book that I worked on was this lovely orange book.
[Edit May 30]
The most obvious problem with this book was the dirt as it had been stored in a very dusty area for a long time. The photos I had here originally didn't really convey the magnitude of the cleaning that was involved so I've removed those in favor of this one that just shows a closer view. The front cover (on the right) and part of the spine have been cleaned. There were some little pen marks, scratches, and stains that didn't change, but the overall dirt layer has been removed. The back cover (left) hasn't been cleaned. Click on the photo to make it bigger if you want to see more detail.


[end Edit]

Also with this book, I reinforced the head cap, cleaned old adhesive from the textblock spine then re-rounded and backed it. The hinges of the case were weak, so they were reinforced and then new endpapers were attached and the whole thing was put back together.
Pretty exciting, eh?

Sunday, May 15, 2011

Another book for PBI

Each year at PBI, there is an auction to raise money for scholarships. I've made a journal for the auction, specifically an OxBow-theme journal, since that's where PBI is being hosted this year.


The last time I went to OxBow, I brought home a booklet about the college which included some photos of the campus. I tore the photos from the booklet and tore a few strips from a Michigan map showing the Saugatuck region, and pieced them together on the covers. The endpapers are hand-marbled by me, and there is a folder pocket sewn into the textblock, made from the OxBow booklet as well. Also includes the bookmark, made from an OxBow information card.


Friday, May 13, 2011

Next week it's PBI


Next week I'll be going to Michigan for Paper and Book Intensive. I'll be taking classes from John Townsend, Carol Barton, and Ann Frellsen. I'm super excited about it and can't wait to share my work and experiences on my blog in the coming weeks.

I made myself a journal to take with me this year. The cover is Suminagashi marbling that I made at PBI in 2008. The pages are a mixture of papers, most of which were acquired at PBI in 2008 and 2009. There are also folders and envelopes sewn into the text block.

Monday, May 09, 2011

Flip Books on a rainy afternoon

My kid came home from school today with a little kit for making a flip book. I don't think he was prepared for my level of excitement. It was, in fact, touted as a "cartoon creator" and the packaging and instruction sheet never used the term flip book. I suppose, a cartoon creator kit sounds more exciting to 6-year-olds! I showed him a flip book that I got from Green Chair Press and then we attempted to make a few of our own. So now we have a stick-man who drops his hat and picks it up, and a rocket circling Saturn. When I have time, I'll definitely want to try a more refined flip book someday!

Saturday, May 07, 2011

Mixed Paper Journals

The only thing better than writing in a handmade journal with mixed papers, is making a journal with mixed papers. I love making these because it gives me a chance to sort and fondle my hoard of paper. These small leather journals are each made with an assortment of papers including different kinds of lined paper, decorative papers, handmade paper, some marbled papers, various colours of plain paper, and even a few maps and illustrated pages from an old story book.

Wednesday, May 04, 2011

The Illustrated Accordion


The Illustrated Accordion is an exhibit at the Kalamazoo Book Arts Center Gallery in Kalamazoo, Michigan (kalbookarts.org). The exhibit will open May 6th, continuing until May 27th. I have a miniature accordion, titled "Piano Generations" that is part of this exhibit.

All the work in this exhibit has been photographed and can be viewed on Flickr. But be sure to check it out "in real life" if you happen to be in Michigan!

"Piano Generations" is a limited edition artist's book, hand-marbled paper on the covers, ink jet printed piano keys, family snapshots in pockets. Limited edition of 10.