Showing posts with label guest blogger. Show all posts

Thursday, July 17, 2014

PBI 2014: Guest Blogger Charlie Wisseman and Printing in Relief

Charlie Wisseman is a retired pathologist who now does mixed media art with a current emphasis on book arts and papermaking. Charlie creates some rather amazing works of art, and I encourage you to visit his website and looks at some of the pictures: www.charleswisseman.com. Charlie took a printmaking class at Paper and Book Intensive this year and agreed to share some of his thoughts about it here on my blog.

Ryan O'Malley, assistant professor at Texas A&M in Corpus Christi,Texas, taught a class in reduction relief printmaking at Paper and Book Intensive in May 2014 at Ox-Bow. As a first-time printmaker with no graphic training or drawing skill, I was a little worried going into this class, especially after seeing the amazing work that Ryan brought to show. His aesthetic is darker and more graphic-novel-like than my usual taste, but the work is dense and graphically powerful enough to pull any viewer in. I chose a graphic from a book to use as my image, and did fine.


Charlie's reduction print made in this class

Ryan taught us the basics of reduction printmaking using carved MDF panels with red and black colors on white base paper. This process is simple and cheap enough for me to play with at home, using an old etching press that a friend passed on to me. I do not aspire to have the astonishing speed and control of carving that Ryan demonstrates, but this is definitely a beginner-friendly process. Ryan was available until late every evening to help, and always willing to assist with corrective carving. By the end I was becoming almost too aggressive with the carving tools. Easy to remove material, but difficult to correct mistakes!


A few of Ryan's printing blocks.


A display of the prints made by the students in this class.

Ryan showed us a simple registration system using Ternes Burton registration pins taped to a jig, affectionately known as "Frenchy". Experience with students has taught Ryan to add some protections to prevent accidentally running Frenchy through the press. As a bonus, Ryan showed me how to print my brain image onto a tee shirt. The print I brought home looks great. My only regret is that the reduction process of carving the block between colors means that there is no going back to do any more complete prints. Only the portion of the image for the final color remains, but the block itself is worth framing.

- Charles Wisseman


Monday, June 10, 2013

Guest Blogger Charles Wisseman, on Daredevil Letterpress at PBI

Charles Wisseman is a retired pathologist who now does mixed media art with a current emphasis on book arts and papermaking. Charles lives in Champaign, Illinois and has a website where he shares some of his work: www.charleswisseman.com. Charles took a letterpress class at Paper and Book Intensive last month where they were literally printing in circles, and any other shape they could manage.

Daredevil Letterpress was taught by Jessica Spring, who teaches in Washington State and runs Springtide Press. She encouraged us to think outside the rectangular box when setting up a letterpress layout. Everyone liked the type held in a circle between a roll of tape and a pipe clamp. This opened our mind to the possibilities, and each participant took a different approach.


Printing circular type.


Printing curvy type.

We all were introduced to the wonders of the California job case, the pica pole, the Vandercook press, mixing ink, cleaning up in the least toxic manner, etc. People were encouraged to do prints with more than one color, and to try for a high level of quality.

There is only one Vandercook press in this studio, so print time had to be scheduled. Jessica spent long hours monitoring the printing. Despite the scheduling difficulties, there was a very cooperative atmosphere.

I decided to use the poster press, on loan from the Morgan Conservatory, because this is what I have at home. I have some wood type, also, so I did a layout of wood type held in a galley tray by a carved-out 1/2 inch foam core. Others liked this method of holding type and made complex and sinuous arrangements of type and image. I opted for all hand inking in the poster press to give a very variable edition for the class portfolio. I also tried some of the pressure printing techniques I had seen in the Sarah Bryant class the week before.


Examples of class work

Others did complex linoleum cutouts, water color additions, sewn in thread, images in speedball cutout material, and color gradients. I had little previous experience in letterpress, so all of this seemed daring enough for me. The portfolio looked great, and one set sold well in the scholarship auction. Thanks to PBI for bringing in this innovative and humorous instructor.

- Charles Wisseman


Saturday, August 11, 2012

Guest Blogger Margaret Braun, Printing with natural dyes

Time for another guest writer and another PBI class. Margaret Braun is an artist in Edmonton, Alberta who has been to PBI three times, and last year was my roommate. This year she was in a class that I think would have been really fun, making dyes with natural and easily obtainable materials. Margaret has agreed to share a little bit about it here on my blog.

Stirring and Stirring and Stirring the Brew...

You may wonder, why bother using natural dyes?

Well, in a course at Paper & Book Intensive (PBI) 2012 entitled, "DIY Screen Printing with Natural Dyes and Materials" with Denise Bookwalter we found out! What fun it was!

Seemingly alive, the organic inks reflect the light in interesting ways. The subtle colours seem to harmonize with each other. One-of-a-kind colours become more mellow, softer, and more beautiful with the passage of time. There is something primitively satisfying about picking weeds and re-routing them into your dye pot to make something useful.

A couple of Margaret's prints from the class:


Concerns for the well-being of our planet can promote avenues for an alternative resource to printing. Vegetable-sourced colours do represent a realistic alternative -- using berries, leaves, flowers, fruits, roots, bark and insects. A mordant (we used alum) can help the dye colour become permanent.

The screen-printing process offers artists a way to produce multiples without the investment of a press and other large apparatus. The basic equipment consists of the screen (a wooden frame with a fine-mesh fabric stretched over it) and the squeegee. This is a rubber blade set in a handle with which the organic ink is pulled across a prepared photo-based screen. The mesh transmits an even coat of ink which adheres to the paper below the screen.

Basic Ink Recipe:
  • bring water to a boil in a pot over a stove burner
  • add plant matter of your choice (chop or break apart plant fibres) and stir occasionally
  • turn down the burner to simmer until you get the desired strength of colour - stir
  • strain
  • add mordant into the coloured liquid until dissolved - of course, stirring
  • sprinkle starch into the pot as you would when making gravy - more stirring
  • continue simmering until ink becomes the consistency of a thick gravy - continue stirring
  • remove from stove and let ink cool - stop stirring
Remember: Not all natural plant materials are safe to use. Search your local library for books or the internet for advice.

Natural dyestuffs produce unique colours that may vary widely from dye lot to dye lot. The temperature, growing soil, cooking times, volume of matter and other elements will cause variations. Most natural dyes are soft shades that reflect the natural world around us -- greens, yellows, blue, browns, grey, soft rose, peach, deep burgundies and a range of violets. Whether it is from the garden, grocery store or the other side of the road you will be sure to discover amazing colours! Most of all, experiment and enjoy your journey of your own personal discovery on a road of many colours!

Thursday, June 21, 2012

Guest Blogger Ann Frellsen, Italian Paper Bindings

Ann Frellsen is the Collections Conservator for the Emory University Libraries in Atlanta, Georgia. She has attended several PBI’s and she never gets tired of them. Last year she was an instructor - teaching the book repair class that I took. Ann has kindly agreed to share with us, one of the classes she took this year, taught by Maria Fredericks.


Maria Fredericks, book conservator at the Morgan Library and Museum taught the PBI class on Italian Paper Bindings from 1500-1800. Maria has done extensive research in this area, and has looked at these bindings in collections in the US, UK, and Italy. In this class we looked at a range of covering methodologies, variations in endsheet structures and sewing patterns via the samples Maria brought, her slides, and the numerous binding models that she had made during her investigation of this genre.

During this time period books had to get from printers to the binders in larger and larger editions and out to the booksellers in shorter and shorter time frames. The need to produce books faster to meet the increased demand resulted in an evolution from elaborate binding structures to the simpler, faster sewing and bindings that were the focus of our class.

Stacks of books created by the participants in this class.
Photo by Fran Kovac.


The earliest historic examples of sewing we made were long-stitched through the thick paper (cartonnage) covers. Our models of the 17th C. styles were sewn all-along on alum-tawed thongs – a supported sewing. Models from the early 18th C. show a variety of abbreviated sewing patterns. No supports were used. Skipping sewing stations or jumping from one signature to the next without using kettle stitches seemed sacrilegious, but many examples of these bindings survive today, so they must be fairly strong. The sewing patterns were fun to learn and really did speed up production. In the class most of us completed at least five different books, and some completed many more.

Our cases were made of very heavy papers; we used the wonderful Iowa Case Paper from the University of Iowa’s Center for the Book and an exquisite piece of Moulin du Verger, a case paper developed to replicate the historic Italian case papers. We also created stiffer laminated covers by layering on slightly thinner Khadi paper. Sometimes the endpapers were pasted to the covers—attaching the textblock to the case – other times we laced on the cases with the alum-tawed thongs we had sewn onto – a reference to the limp vellum binding style that had been popular but was more expensive for the 16th C. bookbinder to make.

Paper case, laced on. Photo by Fran Kovac.

For the laced-on cases we also created small tackets of either vellum or thin strips of the case paper twisted into cords and threaded through the covers. These simple tackets added strength to the case and its attachment to the textblock.

All the while we learned the different binding and sewing structures we also made paste papers using cooked flour colored with watercolors and stamped onto thin text weight Barcham Green papers with beautifully carved blocks. These paste papers became simple wrappers around the thick paper covers (also secured with tackets), adding color and lovely historically reminiscent pattern to the later models we had created.

Ann's Paste Papers. Photo by Fran Kovac.

Maria was a great teacher. She provided extensive information discussing Italian paper bindings and meticulous drawings of the abbreviated sewing variations she had encountered in her research. She kept us historically accurate, discussed conservation concerns, and at the same time allowed us freedom to be creative with our models. It was another wonderful and memorable PBI class.


Friday, August 12, 2011

Guest Blogger Fran Kovac, on 6th Century Coptic Binding

Fran Kovac is a bookbinder in Columbus, Ohio, and teaches basic bookbinding techniques at the Morgan Conservatory in Cleveland, Ohio. She is ridiculously camera-shy, but has allowed me to to use a picture of her fingers sewing a link-stitch endband, very much like the endband for the Coptic structure she describes here.

I first encountered Fran's work, way back in 2006, when we were both participating in a book swap through Volcano Arts. I think she ended up with the first book that I sent. Later I acquired a couple of her marvelous books through the swap. In 2008, I attended PBI for the first time and was chatting with her when suddenly I realized it was the same person, Fran Kovac! She's been at PBI every time that I've been there - and now she's kindly agreed to write about one of her 2011 PBI classes for my blog. Thanks so much, Fran!

While Rhonda was slaving away in John Townsend's Extreme Bookbinding (see her post, below), I was spending the week with a Late 6th Century Coptic structure taught by conservator and book historian Julia Miller. This is an exquisite structure that is a recreation of an extant manuscript known as "Chester Beatty Ms. 815" but also called "Codex C." The original has a parchment textblock sewn with a link stitch at three sewing stations, on papyrus boards. The book is leather covered with an inked design, with a wide wrapping band held with a bone clasp and an attached bookmark.


We began by making our papyrus boards. Pasteboard is simply a board made by laminating sheets of paper or papyrus together. Julia pointed out that there is evidence that boards were often made with fragments, scraps, inscribed sheets and bits of leather and vellum, pressed together, and in fact, we made samples with scraps left over from class. Codex C had papyrus boards, though, so for our books, we laminated papyrus until we had boards approximately 5 mm (~3/16") thick.

We used paper for our textblock, alas, parchment being rather expensive. I added one parchment end sheet to my model for the most verisimilitude I could afford. We folded and marked our textblocks for sewing. This link stitch is recessed in the original, so we carefully cut notches in our textblock to accept the thread. The sewing is rather different than that which is usually taught today: three stations, single needle, with the thread doubled inside each signature. A note about "Coptic" sewing: historically, not all link sewn books are Coptic in origin. We commonly use the terms interchangeably, but unless what's being talked about is an actual Coptic binding, such as Codex C, we should probably use the term "unsupported link stitch."

After sewing, we added link stitch end bands in colored thread, and lined the spine with linen. We made and decorated our bookmarks, wrapping band and bone clasp. The original clasp is vaguely fish shaped, with a single hole for the strap, and is undecorated except for some scratches. We used cold tooling and ink to decorate the bookmark and ink designs on the wrapping band.

We had lovely goatskin to work with to form the case with the papyrus boards. Goat, sheep, and other hides such as camel are believed to have been used in history. This is, essentially, a very early (the earliest?) case binding; the boards are not sewn to the textblock. The boards and leather were laid out pretty much as we would do today when making a case, although with extra wide turn-ins.

Inside front board showing the wrapping band attachment

The end sheets are pasted down to hold the textblock in place. Prior to putting in the textblock, however, holes are punched through the front board to accept the wrapping band and bookmark, and the tricky work of drawing the inked design began. The model of Codex C which was made shortly after its discovery served as our model for the design; it incorporated a Maltese cross, which seemed the wrong time period to me, so I incorporated a Coptic cross in its place.

My thanks to the extraordinary Julia Miller for another wonderful historic bookbinding class, and to Rhonda for the chance to talk about it!

Wednesday, August 03, 2011

Guest Blogger Charles Wisseman, on Moku Hanga and Martin Vinaver

Charles Wisseman is a retired pathologist who now does mixed media art with a current emphasis on book arts and papermaking. Charles lives in Champaign, Illinois and has a website where he shares some of his work: www.charleswisseman.com.

Charlie has been at PBI every time that I have been there and I think he's been there many times more. This year at Ox Bow, he took Martin Vinaver's class on Moku Hanga, a Japanese woodblock printing technique. He kindly agreed to share his class experience here on my blog.

Martin Vinaver was an unusual presence at PBI this year ( May in Oxbow in Saugatuck, Michigan). He is a Mexican from Vera Cruz who fell in love with Japanese woodblock printing, which led him to learn Japanese and spend several years in Japan learning this art form from remaining masters. This is a difficult and labor-intensive process which is in decline. The samples of older prints from Japan show an almost superhuman degree of fine detail and carefully drawn lines.

On returning to Mexico, he set about working with some other Mexicans and foreign artists to try to "Mexicanize" the process, because some of the Japanese materials were very expensive or unobtainable in Mexico. He gave a talk on his art center progress so far, with U-tube clips showing the making of paper from old towels discarded by local tourist hotels, lithograph stones from local quarries, locally cast metal parts for presses, local colored earths for pigments, carbon black from the local bakery, fat for lithography crayons from local sheep, etc. The website for his organization is www.laceibagrafica.org.

In the class we did not try to reach the level of the old masters. Each person tried to carve and print an original 4.5" x 6.5" block of shina plywood to learn the traditional methods of carving (including registration points), mixing pigments and printing on Japanese paper using a traditional baren. Martin brought carving sets of traditional style made locally in Mexico using steel from older quality European files. These were for sale after the class, and I liked the tools enough to buy a set. He brought powdered earthen pigments from Mexico, demonstrated traditional baren-making (which we all tried).

We were all feeling pretty good about our designs and carving, until Martin came in on the third day and said that we needed to carve our negative spaces deeper to avoid stray ink transfer. In the cold studio space this was not welcome news, but the final results were worth it. I carved a turtle design using two blocks.

Moku Hanka Woodblock Print by Charles Wisseman

Carving to have color areas contact without gaps or overlaps was harder than I expected, but we were all pleased with the results. The main challenge is to think in terms of color areas rather than lines. I have no graphic training, but found the final result pleasing.

Martin's other contribution was tai chi instruction in the open before breakfast every day. I liked his style better than other forms I have tried, but probably can't find a teacher here. What a great way to start the day, though.


Martin Vinaver leading tai chi at Ox Bow


Saturday, July 09, 2011

Guest Blogger Elizabeth Sanford, Tunnel Books

Elizabeth Sanford is a watercolor artist who was seduced several years ago by the book arts. She is fond of flexicubes and teaches at Watkins College of Art, Design & Film in Nashville, TN.

Elizabeth's website is currently being remodeled but be sure to look for the revised version of elizabethsanford.com this Fall. Elizabeth has kindly agreed to tell us about the tunnel book class that she took at PBI this year. Thank you, Elizabeth.

I love Andrea Dezso's work (www.andreadezso.com), so when I saw that she was teaching a tunnel book class at PBI, I had to sign up! We learned 3 tunnel structures: the Jennifer, the Stephanie and the Luminitza.

My favorite was the first one, the Jennifer, so I spent most of the workshop on that one. It's a structure that Andrea invented that involves sewing the panels to the accordion sides so that they almost float. If you look carefully, you should be able to spot the silhouette of a bird (a yellow-billed cuckoo) in the front panel; there's another hiding in the branches on the second panel.


I started cutting these panels with an x-acto knife but switched to a scalpel in the middle of this model, and it was so much easier! I got mine from the PBI store run by Nancy Morains (here's her website: www.colophonbookarts.com/binding.html). I'm also interested in trying the kind of Olfa knife with carbon steel blades that Andrea uses.

The other 2 approaches are based on commercially printed books. The Stephanie is adapted from Winnie-the-Pooh's Pop-up Theatre Book (1993). The panels are attached with tabs at the top and bottom, and it folds flat. Here's my model in the open position:


The Luminitza is a 4 layer pattern based on a German book published in 1878. Here's Andrea's diagram, which reveals some of her humor:


I'm currently working on a more complicated version of the first model. Here are the 5 panels:


I'm planning to have more space between the panels this time so it will be easier to find the creatures that are hiding in the woods.


Saturday, June 11, 2011

Guest Blogger Amy Greenan, In Search of Content

Amy Greenan is a fine artist, graphic designer, teacher, and also a bookbinder and she was a fellow participant at PBI this year. Amy agreed to tell me more about one of the PBI classes that I didn't take (since one person can only take 3 out of 10 classes). This is her account of the class, "In Search of Content" with Susan Skarsgard.

You can see some of Amy's work on her website (www.amygreenan.com) and learn more about her activities on her blog (www.chociblog.blogspot.com).

Two of the classes I had the pleasure of taking were with Rhonda – Book Doctor 101 and Fragments of Bookbinding Structure (otherwise known as Extreme Bookbinding!), which she’s already written about. So, Rhonda has asked me to tell you about my experience in a class that she didn’t take, which largely dealt with creating content for the artist’s book and the creative process in general. Of the three workshops I signed up for, this one was the most “arty” for sure.

In the over ten years I’ve been making books, my focus has mainly been on playing with structure and design, and so producing mostly blank books for other people to fill in. As an artist whose main medium has been paint on canvas, making books for me has been something to relax in and not feel pressure to make something particularly meaningful. I must admit, though, that was getting stale – I’ve been spinning my wheels for way too long, and for someone who also ended up becoming the bookbinding person about town over the years and teaching it quite a lot, I really wanted to up the ante and get more serious about it. I wanted the work I was making in that form to be as interesting and meaningful as I hope my paintings are.

The Paper and Book Intensive was truly transformative in that way – I found what I was looking for in the sense that I did have a lot of focus on more serious things like book conservation and historical bindings, but I also found myself really inspired during and outside the workshops. The people – don’t even get me started on how great every person attending PBI is. Being amongst a large group of “your own” is truly life-affirming – I am not exaggerating on this point. The one workshop that really opened my eyes and my imagination up to the possibilities of communicating big (and more personal) ideas visually and via the written word (hm, going back to my zine days!) was with Susan Skarsgard, an amazing woman of many talents, least of which is designing logos for cars (Saturn was hers!), but also beautiful and illustrative calligraphy, and an challenging but effective teaching style – a little drill sergeant mixed in the first couple days to draw us out of our respective modus operandi for sure.

In the first two mornings we had together, we created content, almost unknowingly. Using the old exquisite corpse trick, we as a group of 12 wrote 12 different poems, each with its own surprising tone and message. A similar method was used to create visuals, “merely” mark-making exercises where Susan’s real boot camp tone came out at its best. Moving around the tables almost constantly and working with varied media and colors, with less than 30 seconds to connect with the paper in front of us at a time, we truly got a workout, creatively and physically. We were urged to make different marks every time, usually with a prompt, for example “Make a dotted line across the page!” “Draw four squares!”, “Draw a slow line using your tool in an unexpected way,” etc. We also worked on creating the essence of letterforms one mark, one person at a time, and then tried working with India ink only (and then washed away our efforts with a hose outside the studio!). A couple hours of concentrated effort resulted in a series of large pages for each of us to claim and further work with for our individual projects.


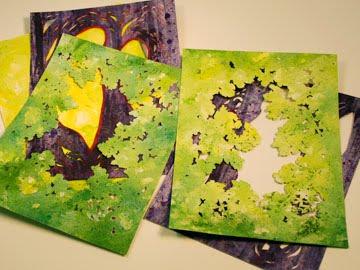
Then came the challenge of putting all these disparate parts together into a book structure. Susan showed us one she devised that was Frankensteined out of the “Instant Book” that involves only some simple folding and cutting and creating a section out of just one sheet of paper. This I was familiar with, but then she proceeded to put a few together using some sewing similar to a Two Sewn as One binding, except there was an extra sheet in there somehow. Very clever! She then demonstrated a wrapped soft cover using some Bristol board and Canson Mi-Tientes (one of my favorite papers!). In the end, these simple and familiar techniques yielded a beautiful, sturdy structure that presented many possibilities. We now had imagery to respond to, add words to, develop further visually. Sometimes pages, by fate alone, appeared to be perfect compositions without any additional workings. Others suggested the need for something, anything. Everyone had a slightly different approach, of course. Hedi Kyle, the luminary of our bunch, reveled in cutting out windows in some of her pages and using pochoir (stenciling) to create deceptively simple and stunning abstract imagery. I should have taken note of her approach – taking care to work into every page a bit at a time so that she was able to have what appeared to be a complete work in a very short time. But hey, it’s Hedi Kyle! Would you expect any less?

My particular book ended up being one of those that wasn’t so felicitous. I decided to work into all the spreads, but only got so far as the third one before class was over. That was fine, it gave me something to take home with me. I found myself inspired by the natural surroundings we lavished in at Ox-Bow, and I used a pine cone and an acorn top as visual talismans. My poem (though not really just mine, but everyone’s) worked perfectly with the images I was producing, so I let myself be inspired by Susan’s lovely calligraphy and explored not only the words and how they danced with the images, but also the letterforms themselves as individual images. This naturally appealed to the graphic designer in me.

All in all, this class was immensely satisfying. Susan was a delightful study in contrasts – one moment extolling the virtue of slowly folding the paper, and really feeling its pliability, taking time to really know it; the next barking out orders like the most efficient line cook. I tell you, sometimes, it’s really nice to have someone tell you what to do and how to do it. When you can give yourself over to that and let the process take over, it can result in the most amazing things.