Showing posts with label paper making. Show all posts

Sunday, February 19, 2023

Vegetable Papyrus

A couple months ago, I attended a zoom presentation about making vegetable papyrus, with artist Yuka Petz. Yuka does a lot of cool stuff, which you can see on her website, www.yukapetz.com. We met at PBI one time, like, maybe a decade ago? Fun times. Gawd, seems like forever. Yuka is also now hosting a wonderful video series called 'Artist's Books Unshelved' which you can view on Youtube.

So, the vegetable papyrus demo was a great introduction to the process. Yuka provided a lot of incredibly useful information and tips on how to get started making this stuff and my first expiriments were quite successful, all things considered.

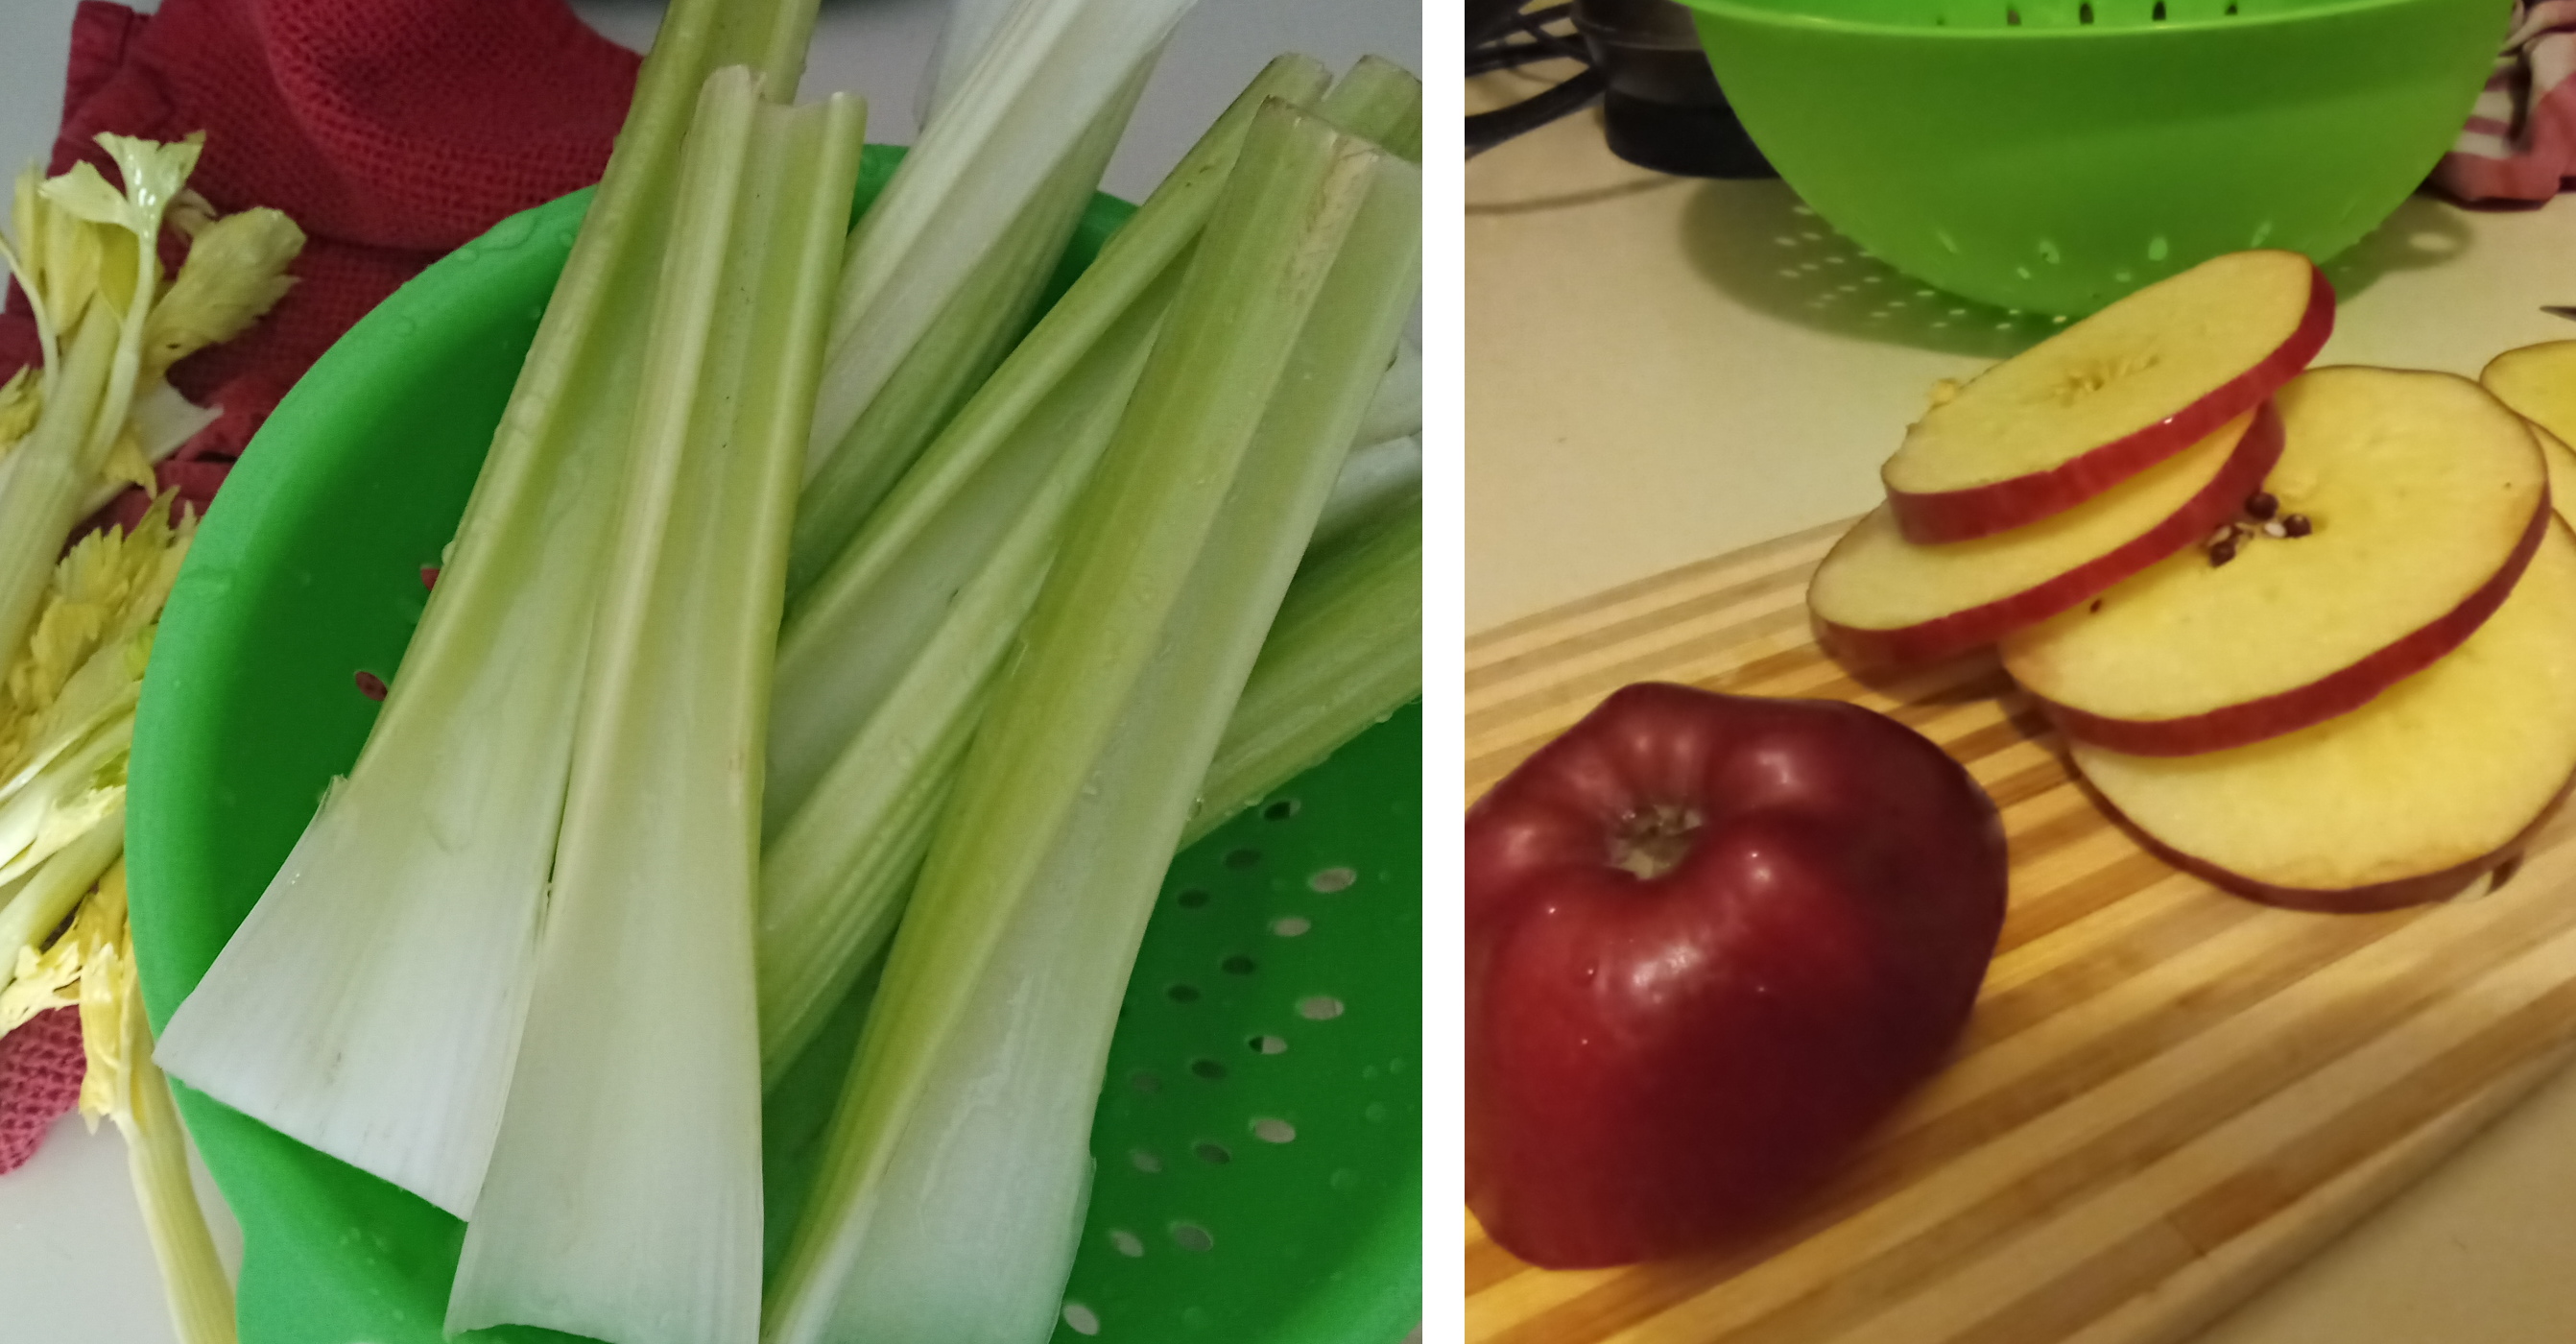
I started with celery and apples. I used celery because I thought the long stalks might result in something similar to Egyptian papyrus. I also tried the apples, mainly because I just had apples on hand!
Celery and Apples
This next photo shows the cooked celery before it was pressed, and then the resulting papyrus after all the pressing and drying.
Cooked celery
Drying time was surprisingly long. A couple weeks actually. Though, I'm sure that's largely due to the natural humidity living near the ocean and whatnot. So, these are the most successful pieces from my first round of papyrus making:
Finished papyrus sheets
I'm planning to raid the rhubarb patch in a couple months and try making papyrus with that!


Update:
Well, I tried using rhubarb and the results were disappointing. Rhubarb falls apart too quickly during cooking and it was very difficult to work with. I recommend that you stick with the veggies that will retain their shape during cooking.

Friday, July 14, 2017

Sacred Books of the East, at PBI 2017

In May, I attended Paper and Book Intensive at Ox-Bow School of Art in Saugatuck, Michigan. It was very nice to be back, after having skipped the previous year! As always, each participant takes three courses at PBI so I will share here a bit about each of mine. The first one is "Sacred Books of the East" with instructor Jim Canary. I had never met Jim before, but his name is one of those that I have been hearing and reading about for a long time. Jim's class turned out to be one of my favorite classes ever. I learned a lot - because so much of the content in the class was new to me - and well, everything Jim said was just fascinating, so thanks, Jim! Jim travels and researches extensively in the Himalayan region so the quality of knowledge that he brings to the subject is extensive and also personal.


We covered a lot in this class. We made two book structures: a palm leaf book with painted wooden covers, using real palm leaves for the pages; and, a sewn Tibetan structure that is historically very old, but practically unknown. We also cooked up pots of indigo, safflower, walnut, and cutch for dying and we were able to do lots of experimentation with paper dying techniques and then incorporate some of those papers into our books. Jim also provided many Tibetan printing blocks that we were able to use. We also prepared fibers for making paper using traditional Nepalese techniques. The fiber was soaked and cooked and cleaned and beaten with mallets then we pulled sheets using the traditional pegged frames that Jim provided.


All of that happened in just four half-day sessions. On top of all that practical work, Jim also shared many stories about his experiences in Tibet, related to books and paper and otherwise. A great way to spend four days!

There are additional photos on my Facebook page.

Monday, September 07, 2015

Book #250

Hash Marks

This is a stitching pattern from Keith Smith's book Quick Leather Bindings, although I've used it here on a simple paper wrapper. It is a 4-section sewing even though it kinda looks like it might be only three. The cover is Saint-Armand paper, and the pages are all handmade paper that I made in my papermaking class as PBI earlier this year.

Monday, June 29, 2015

Book #180

Span & Link

A 2-section binding today, stitched through a case. The cover of this book features some handmade paper from my paper making class last month at PBI, with Steve Miller. It's a flax paper that we made, starting with long fibres that we chopped by hand and then it was cooked and beaten. We did two batches of flax, actually, one was cooked and one was raw and I have to admit that I can't tell them apart now!

Saturday, August 16, 2014

PBI 2014: Papermaking and more Papermaking

There were two impressive papermaking classes at PBI this year. I was not in either of them, but it looked like they were doing some amazing work so I wanted to show a few pictures, just to give you an idea of the extraordinary work that is done at PBI every year in the papermaking studio.

The first papermaking class was taught by Anne Marie Kennedy. She instructed the students on making paper with a variety of different fibers, including some local plant fibers. They made a wide range of papers, with some that were nearly transparent and others that were thick and opaque. They also learned methods of manipulating wet sheets allowing them to include found objects, add texture, create patterns, etc.

A few of the papers from Anne Marie's students:


The second papermaking class was taught by Kerri Cush­man. In this class they were focused on creating unique papers with the added intention of using them to create sculptural books. They learned how to use stencils and shaped-deckles, and different couching methods to create layered sheets, etc.

Here is a small sampling of paper made in this class where several techniques are evident:


And as I mentioned, the students in this class also made books. This next photo shows books made from shaped sheets, and the last photo shows some of the book-boxes that they made.


As usual, an astounding quantity of paper was made during these two classes. The results of the papermaking classes are always a surprise to me, since papermaking is really out of my comfort-zone. Impressive work from everyone involved, for sure.

Sunday, June 22, 2014

The Morgan Art of Papermaking Conservatory

Last month, I had the opportunity to visit and teach at The Morgan Conservatory in Cleveland, Ohio. The Morgan was established approximately 7 years ago and, as its website states, it is "a non-profit art center dedicated to the production and preservation of hand papermaking and the art of the book."

The website doesn't seem to mention a date for when The Morgan was established, so my 7-year approximation is based on my memory of a presentation about The Morgan when it was still in its earliest development. There was a slideshow that consisted mostly of photos of an empty warehouse and Tom Balbo explaining how each corner of the building and the lot would be used in the future. That presentation was in 2008. Tom Balbo, a paper and ceramic artist, was the man behind that presentation and is now the executive director of the centre.

When I first arrived, I was given a tour of the facility and trust me, the magnitude of this place cannot be overstated. It's a big building, but they have also figured out how to make it seem bigger on the inside than it is on the outside. There is some office space, but much of the centre is dedicated to paper making. They do both Western and Eastern styles of papermaking so there is equipment for both, several beaters and tanks in many sizes and styles, large and small hanji tanks, and more molds and deckles than I've ever seen in one place before.

One of the small beaters.


Part of the mold and deckle collection.


A small hanji tank.


There is also an outdoor area where they are growing raw materials for some of their paper. They have created a kozo garden so they have been able to harvest their own kozo for making paper.

A bit of the Kozo garden.


There is also a gallery space, a bindery, and an extensive letterpress studio with several presses and tons of type. When I was visiting, the gallery space was being used for a letterpress exhibit.

Part of the gallery space.


Of course, I spent most of my time in the bindery area where I conducted two one-day workshops. The first day, I taught Anne Goy's Criss Cross binding (formerly known as the Secret Belgian Binding).

Books made in the workshop.


The second day was a Japanese bookbinding workshop where we did two different bindings: a multi section binding (seen here with the colourful Chyiogami cover papers) and a traditional account book structure.

Japanese books made in the workshop.


The workshops were great and I really enjoyed my time there. Thanks to The Morgan for this opportunity (and thanks to Fran for hosting and housing me). Anyone who is interested in papermaking and book arts should add this place to their "to do" list and visit if you find yourself in Cleveland. They have an impressive list of workshops continuing throughout the summer too (more info on their website).

If you'd like to see a few more pictures that I took or a whole bunch of photos that were taken by the staff at The Morgan during my workshops, you can visit my page on Facebook or The Morgan's facebook page.
Friday, September 27, 2013

Guest Blogger Ashley Ivey, on Big Ass Paper at PBI

Ashley Ivey is my guest blogger today. She is a designer and maker living in Tallahassee, Florida. She spent the past year working at Florida State University's Facility for Arts Research and Small Craft Advisory Press (Scap.art.fsu.edu). Ashley and I met at PBI, and spent some time chasing wet paper around the grounds of OxBow, in the middle of the night, as a thunderstorm was rolling in around us. But that is not what she is writing about. Ashley has very kindly written a post for us about her class with Julie McLaughlan, where she made some REALLY big paper.


Big Ass Paper with Julie McLaughlan was incredibly fun, rewarding, and truly hard work! Julie began the workshop by showing us examples of finished papers. Julie's fantastic, corset-inspired sculptural art pairs handmade Kozo paper with steel armature. She often dyes the soft, tissue thin sheets with Indigo or Kakishibu.


Julie McLaughlan

Julie and Andrea Peterson had worked the fiber to the final stages by the time our workshop began, but they explained the whole process from growing the Kozo plant (commonly known as paper mulberry in the US) to harvesting it, stripping off the bark, drying, boiling with soda ash, rinsing, and finally beating the fiber to pulp. We all took turns hand beating many pounds of rinsed Kozo. Each pound was beaten with wooden mallets until it reached the consistency of mashed banana and dispersed easily in water. This was seriously hard work, but really fun to do with cheerful classmates overlooking the positively lovely lagoon at Oxbow.


Ashly (far right) & classmates beating kozo.

While part of the class began beating pulp, others began assembling the huge portable screens Julie brought for forming our Big Ass sheets. The 8.5' x 7' (2.6m x 2m) frames are made from 1" (2.5cm) aluminum tubing and are designed to break down easily for storage and travel. A system of threaded rods, bolts and washers connects and tightens the frame after each side is run through the corresponding pocket in the screen.

Our class worked with several screen designs and as the workshop progressed, we found that we liked a new version of Julie's screens that had sleeves covering the majority of the metal frame sides. The 5" (12.5cm) wide pockets held strong against the weight of the water, pulp, and formation aid and were easier to grip than older versions that attached to the frames using tabs. Julie has experimented with several screen materials and recommends sunshade screen or heavy mosquito netting.

The pool (please forgive me for this breach in proper terminology! I detest the word v-a-t and in this case it was so large that 'pool' seems a more proper description anyway!) was made from 8' and 10' lengths of 2"x12" boards (2.4m and 3m lengths of 2.5cm x 30cm boards). The frame was placed over a heavy blue tarp and then thick plastic sheeting was layered over the frame to hold the water. Julie warned us not to use cheap tarps as the fiberglass they contain can make it into your feet!


Eight people pulling a sheet of paper.

The "pool" was filled about 3/4 full with water and then the beaten Kozo and a healthy dose of PEO formation aid. To keep the pulp as clean as possible, pairs of us took half-day shifts in the pool dispersing fiber and guiding in screens. Pulling each sheet required 6-8 people: 2 in the pool to carefully drag the screen across the bottom; 2 on the end to guide the screen in and hold it down; and 2 - 3 on each side to help lift the screen slowly and evenly out of the water. Each frame was then carried out into the sun to dry.


Big Ass sheets of paper drying in the sun.

When the sheets were dry, we rubbed the backs of the screens to loosen the fibers and then carefully ran our hands between the screens and the paper. The cracking sound of pulling large well-formed sheets off was ecstasy, however we also had many spiderweb thin sheets that took great patience to remove.


Carefully removing paper from the screen.


Stacks of beautiful handmade paper.

In addition to the mass production of giant paper, Julie demonstrated Kakishibu and Indigo dying and we all made tons of smaller sheets of paper (with and without inclusions). It was an amazing class and we all left with tons of paper. Three cheers for Big Ass Paper!

- Ashley Ivey


Wednesday, June 19, 2013

Guest Blogger Victoria Cowan, on Finesse Papermaking at PBI

Victoria Cowan is my guest blogger for today. She is an award-winning artist and a gifted instructor. Both experimental and productive, she shows new work regularly in a number of venues, and is much in demand as a workshop leader. Because her preference is to explore an idea in depth, Victoria usually makes a series to follow the branches of an original inspiration. Perception, cognition and memory are her particular areas of interest. For more about Victoria, visit her website at www.victoriacowan.ca. Victoria attended her first PBI this year and started her first day making paper in Bernie Vinzani's class. Thank you for sharing your experience here on my blog and I am looking forward to seeing what you do with your papers in the future!

First class of first day and, typical of me, it only took me a few minutes to put my foot down my throat, not wanting to share a screen. And who did I 'reject'? Why none other than the instructor of my class in the next session. Some days one just does it all off kilter! My reason was clear enough to me (hoping to use the paper I made in an artists' book and thinking that it would lend itself to a good layout if the watermark only took up one side of the sheet), but perhaps I could have done it differently? So I am very appreciative of her not holding it against me.

As an experienced instructor myself, I was impressed by Bernie's exhaustive hand-outs on paper-making. He is also a deeply thoughtful person—he brought an historic document from a paper-making company in Scotland to show to me, because their name was the same as mine.


Bernie Vinzani

Watermarks attached to the screens

Bernie showed us how to apply our watermarks to our screens. Since mine was quite simple, I was ready to make a sheet quite quickly. And luck was with me; the very first one had no clumps, bumps or tears. Bernie publicly announced it; I was no longer a paper virgin.

Everyone was very helpful and there was much interpersonal questioning and showing of methods.


Tom Balbo

Tom let me try his beautifully made small mould & deckle. Annie responded generously when, looking over her shoulder at her mixing different colours of pulp and flinging tears at the screen with abandon, I asked, "Er . . .what are you doing?" The sheets I made as a result are among my favourites because they are so painterly and could become a rich ground for a series of prints.

Two-colour papers

We used different kinds of pulp—including an abaca and hemp mixture, and cotton. Comparing them with what I'd seen when people experiment with using a hand drill for beating pulp in a pail was an immediate and powerful lesson in the importance of a good beater and well-made pulp. Thanks, Andrea!


Samples of class work on display

Now that I have such luscious sheets, each unique, each both delicate and strong, I'm almost afraid to use them. You know . . .it's that old artist thing about not ruining one's canvas, whatever that canvas happens to be. But I'll get over it, and hope I may guest blog again at that time and show you all what I did.

Because the first two days were wintry and the concrete floor very cold and wet, I was wearing thick-soled winter boots made with a waterproof fabric. Shudda known better! I'm pretty sure they are now transformed forever, a souvenir of my first days at PBI that will always make me grin.

- Victoria Cowan

Saturday, September 08, 2012

Guest Blogger Mary Patton, Paper Sculpture

Mary Patton is a paper sculptor currently living and working in Chicago. By day she is a Math tutor with AUSL; by night a free-thinking, nose-to-the-grindstone paper making MacGyver. She is in the process of making a website, if you adore her work, email her for sales inquiries. Mary is also a burlesque dancer, gluten-free cookery queen, and all around nice gal. Visit Mary's tumblr page for updates from her. At PBI this year, Mary took a class with Lee Running and Mary has very kindly taken some time to share that class with us here on my blog.

At the intersection of pulp, tradition, and the avant-garde is where you will find Lee Running. At least, this is where I met her at PBI 2012-in the Clute on Oxbow campus, where I became her studio assistant for four days of pulpy bliss.

As a student, Lee was introduced to paper as a medium while working for Dieu Donne in NY. It is considered the gallery for papermakers -- both experimental and traditional. While at Donne, Lee had firsthand experience working with paper in non-traditional ways. After being bitten by the pulp-bug, she read Tim Barrett's book Japanese Papermaking: Traditions, Tools, and Techniques that outline completely the traditional process of hand papermaking in Japan. This book, she says, "changed her life" in such a way that she wanted to "make paper that looked like paper."

So Lee Running set out to the University of Iowa to work with Tim Barrett. The rest is history -- as they say. Since that time, Lee has composed a body of work involving paper as the medium, nature as the message, and currently holds a position teaching sculpture at Grinnell College in Grinnell, Iowa among other appointments. Please consult her website for more more information and to view her beautiful work: leeemmarunning.org.

One of the many things I learned from Lee was that all stages of fiber preparation are to be respected. Dried sheets of flax, cotton, and abaca came to us from Carriage House in New York. These sheets were soaked in buckets of water, measured to two pounds in each bucket and then completely hydrated to soak before going into the beater. After each fiber was beaten to the desired consistency the beater went through a thorough process of cleaning so as not to contaminate the next batch of fiber with the previous.

On the first day of class we met outside at two long tables butted against each other, dotted with buckets, each student quizzically carrying a hard-boiled egg from breakfast. We were to make plaster molds of the positive and negative spaces of the egg for paper casting. From these molds and eggs we would, that day, cast both cotton and abaca fiber sheets. The class learned the finer points of plaster sourcing, the proper consistency of plaster to cast, and mold building. The two most important points being that: A lubricant is very important in release, and plaster over the meridian line of your egg will cause a painful separation of positive and negative.

One of Mary's paper sculptures:


While our two-part molds were drying, Lee taught us the basics of sheet pulling, about molds and deckles, as well as the proper stance so as not to strain your shoulders while standing at the vat. Our first two days were instruction time and test making. By experimenting with restraint drying techniques students were able to see how temperature, and fiber type reacted to horizontal as well as vertical drying.

The abaca fiber was "over beaten", that is to say it was beaten in a fiber beater for 5 hours, and had considerable strength. Upon drying, a flat sheet pinned on three of its corners to the wall would pull out the third corner causing it to stand out by an inch from the wall. By comparison the cotton fiber merely loosed the pin, and had a fluffy texture, as it was not restraint dried flat.

Lee brought along with the fibers, a double boiler and beeswax. With this the class was able to coat its papers and sculptures producing some interesting effects. The paper takes on a luminescence, and weight; appearing less like paper and more as plastic. This is a technique I am excited to incorporate into my own work.

Another paper sculpture by Mary:


Students were able to create exciting new experiments without fear of failure such as Shifu, the twisted paper threads native to Japan; wax dipped papers; pulp cast from wire and fabric molds; sewn, glued, and various cast constructions as well. Fibers were combined such as cotton and abaca to produce texture and tension. Hats, masks, baskets, and sculptural books were all made with joy.

Paper sculptures from various members of the class,
including some of Mary's work.


The effects of the class, for me have been life changing. I am no longer considering an MFA in book arts but one in sculpture; sculpture centered on the merits and potential of paper. Indeed, I am running headlong into a world where paper looks a bit unlike paper and that is just fine by me.

Saturday, August 25, 2012

Guest Blogger Sandra Anible, Decorating Handmade Paper

Sandra Anible is a book artist living in Madison, Wisconsin. I met her at PBI in May 2011, when she was a PBI participant and one of the lucky scholarship students who was on hand to help keep PBI running smoothly. Sandra also wrote for my blog about one of the other PBI 2011 classes, making conservation enclosures with Denise Carbone. This time she has written a review of Bridget O'Malley's paper-making class, also from PBI 2011. Thanks for sharing your class experiences with us, Sandra!

At the 2011 Paper Book Intensive, Bridget O'Malley taught a class that featured several creative methods for decorating freshly couched handmade paper. O'Malley is co-partner with Amanda Degener of Cave Paper (www.cavepaper.com) in Minneapolis, Minnesota. She first taught us how to create sheets of handmade paper using both cotton and abaca fibers. After we became comfortable with the Western method of pulling sheets, she provided instruction on how to screen-print pulp onto the handmade paper.

Some of the papers made in this class:


The method entailed painting a piece of stretched polyester fabric using Speedball drawing fluid. After flooding the fabric with Speedball screen filler, the water soluble drawing fluid resisted the non-water soluble screen filler, and the painted image was washed away with water after the screen filler dried. This created a means by which the imagery would be screen-printed onto the newly made paper using a finely beaten, pigmented pulp.

We then used our xacto knives to cut pieces of mylar film in order to create stencils. A mylar stencil could be placed over a freshly couched sheet of paper, and pigmented pulp could be applied over the stencil in order to make creative, editionable papers.

Blocks of Easy Cut were made available, as were relief cutting tools. We were encouraged to cut designs into the blocks for impressing into the handmade paper during the pressing and drying processes.

A few more papers made in this class:


These and other techniques were all employed for the grande finale--a class-wide portfolio exchange. Each member of the class was given the creative freedom to make an edition of papers using any combination of the techniques that had been taught. For a celebration of the anniversary of Hand Papermaking, an exhibit of one of these portfolios was later displayed at the University of Wisconsin-Madison.

Throughout the class, Andrea Peterson (hookpotterypaper.com) was on hand for management of the studio space and work flow among the students - necessary because our class was highly prolific, churning out collections of paper that kept Andrea busy, and kept the dryer full for the duration of the class. Our collections overflowed the show-and-tell table at the end of the week!

Tuesday, August 04, 2009

Making Recycled Paper

My kid and I recently made a couple batches of recycled paper. Most of the steps involved in the process are very attractive to four-year-olds. Using a paper shredder, using the blender, making a tub of mushy pulp, then splashing around in it! What could be more fun than that?

We started by sorting through my paper scraps, making a pile of brown and black papers, and another pile of pink and red papers. This is a great way to recycle paper scraps that are too small for anything else. After the papers were sorted, we shredded them.


The black pulp was rather dirty to work with but that didn't bother my little assistant. The pink pulp, he thought, was very similar to a strawberry smoothie.


The results of our labour: several sheets of dark grey and pink papers. The grey paper has a secret ingredient as it is intended for a special project, but that's all I'll say for now - more about that later!

Saturday, June 14, 2008

Scrap paper solution

Ok, after much deliberation about what to do with my excessive quantities of scrap paper, I decided to turn it into...paper. So I began by obsessively dividing it by colour. And so far I have just worked with the greens and the yellows-oranges.


I used these scrap papers to make tubs of pulp.


Then made myself some new paper.


I got about fifty sheets of each colour. Now rather than a big box of paper scraps that I hadn't been able to find any use for, I now have almost 100 sheets of handmade paper that is quite usable. I still have piles of red, blue, brown-black, and white paper scraps with which I'd like to do the same thing; however, the process is so time, space, and labour intensive that I might not get it done for a while. But the results are quite satisfying.